
Monday, 27 October 2014
Covering my tracks
Quick progress with the re-fronted wig. I attached the lace top/front and began ventilating it. I need to make sure I cover the hard edge, where the wefted tracks of the commercial wig begin. I'm knotting 3-4 hairs at a time just to get things moving. When I get to the front lace I will start knotting single hairs for a realistic hairline.
Saturday, 25 October 2014
Re-fronting another commercial wig
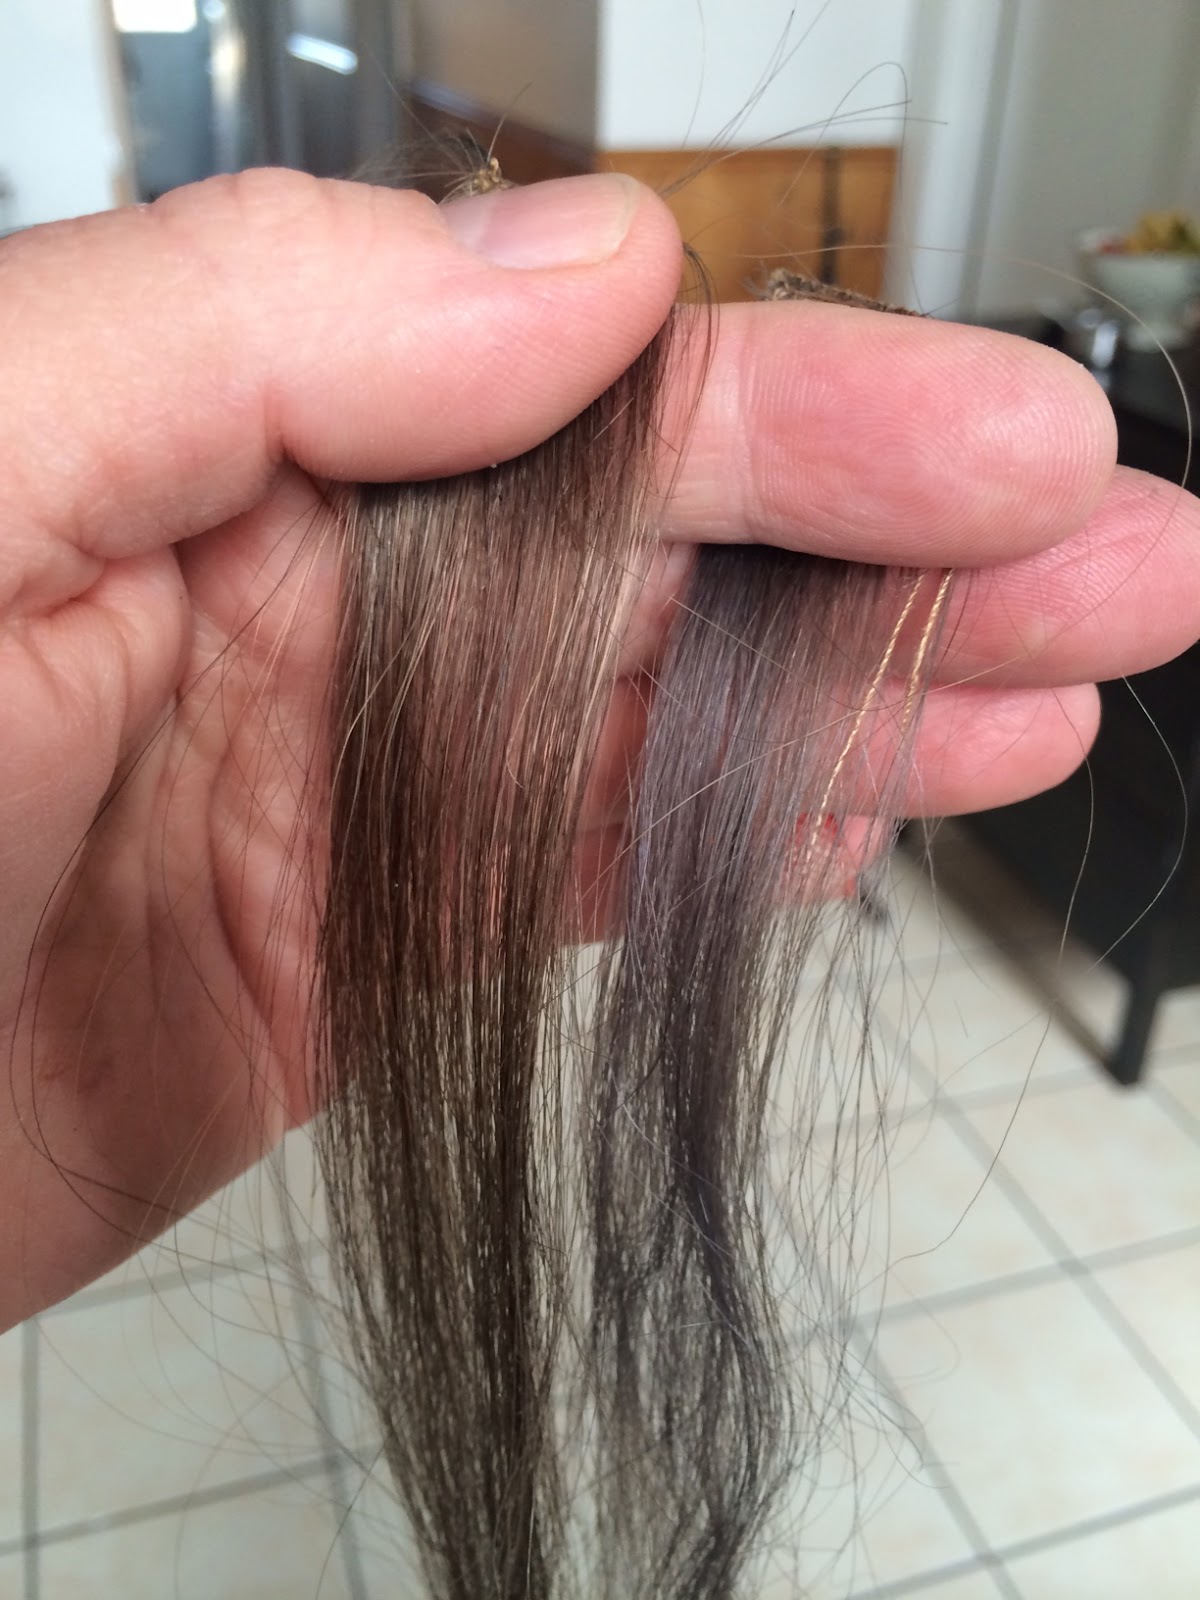
I swore I would never do this again, but for some reason I decided to have another go at re-fronting a commercial wig. I found this one on eBay. It was made from heat-resistant fibre that looked quite nice, and was very inexpensive so I bough two of them. I will use one for the back section (see the photo) and I will cut the hair off the other one to ventilate the top and front.
In the photo you can see that I have cut out the entire top and am in the process of attaching lace. The wig had a very unnatural-looking crown, right on top of the head (rather than where the crown should be) so I decided to get rid of the whole thing.
I might use the wefts that I removed from the top to add a bit of volume to the back. It is a nice natural density now, but the wefts seem quite visible. I will see what it looks like once the new top has been ventilated, and decide then if I need to add any wefts to the back.
This should hopefully be a quick project. I have several others on the go, but I prefer having options as I tend to get bored easily. Stay tuned...

Friday, 19 September 2014
Quick update on the blonde synthetic wig
Apologies as usual for not posting more frequently. I have taken a couple of weeks off work, so have had a bit of free time to work on the blonde synthetic wig.
It is aaaaaalmost finished, just the crown to complete and a bit of hair in front to fill out the temple recession areas.
I had to take it off the block today to modify the pattern, so I took the opportunity to test the hairline and take a few selfies!
Here's one in which I'm looking particularly studly. Axl Rose, eat your heart out...! HAHA!
Saturday, 14 June 2014
Blonde, continued...
Just a few shots to show the progress of the blonde synthetic wig. It's coming along well, and a bit quicker now that I'm knotting in a clear open space on top rather than trying to dodge seams and darts!
I have decided I will continue to ventilate all the way to the top seam before changing the fronting lace.


I have decided I will continue to ventilate all the way to the top seam before changing the fronting lace.
Friday, 13 June 2014
Thanks for sharing!
As someone who hasn't had any formal training in wig making, I find it difficult at times to find answers to some of my technical questions on the subject. Many wig makers, understandably, keep their methods and sources a closely-guarded secret.
There are a few I have come across who are incredibly generous with their help and advice. I just wanted to add a quick post to say how much I appreciate everyone out there who is willing to share their knowledge with those of us who are trying to learn the ropes.
A huge source of information and inspiration for me has been Super Wig Maker on YouTube. I really admire his ability to take a problem or situation and break it down into the most minute detail to find the solution. He is not a professional wig maker, but he works with very basic tools and supplies to explore and experiment continually, and shares his knowledge freely. If you're interested in learning to make wigs, you should definitely check out his channel:
https://www.youtube.com/channel/UCB9_pmyRjgrIRygdtajg3nA
I just received a tip from another excellent wig maker, Sam Cox (a professional in the UK.) His advice has quite possibly changed my life! Well, it has definitely changed the way I make wigs from now on!
I have been worried because the very fine front lace of the current blonde wig I'm making is fraying at an alarming rate:

I asked Sam about this via email, and he told me that if the lace is turned 90 degrees, so that the holes run horizontally instead of vertically, the lace will not fray!
I tested it out on a scrap piece of the same lace, and it really does make a difference!
The downside is that now I will have to remove the front of the wig and replace it with new lace, but it will definitely be worth the effort and expense to prevent the front of the wig from falling apart.
You can check out Sam's excellent work on his website: http://www.samcoxwigdesign.com
So, my sincere thanks to everyone who has shared a tip or helped me out along the way. I hope that some of my posts will be useful to other would-be wiggies along the way too. :P
EDIT: here are a couple of diagrams to illustrate what I mean. If you look at the photo above you will see that the holes in the lace are currently running like this when you look at the cap from the front:


There are a few I have come across who are incredibly generous with their help and advice. I just wanted to add a quick post to say how much I appreciate everyone out there who is willing to share their knowledge with those of us who are trying to learn the ropes.
A huge source of information and inspiration for me has been Super Wig Maker on YouTube. I really admire his ability to take a problem or situation and break it down into the most minute detail to find the solution. He is not a professional wig maker, but he works with very basic tools and supplies to explore and experiment continually, and shares his knowledge freely. If you're interested in learning to make wigs, you should definitely check out his channel:
https://www.youtube.com/channel/UCB9_pmyRjgrIRygdtajg3nA
I just received a tip from another excellent wig maker, Sam Cox (a professional in the UK.) His advice has quite possibly changed my life! Well, it has definitely changed the way I make wigs from now on!
I have been worried because the very fine front lace of the current blonde wig I'm making is fraying at an alarming rate:
I asked Sam about this via email, and he told me that if the lace is turned 90 degrees, so that the holes run horizontally instead of vertically, the lace will not fray!
I tested it out on a scrap piece of the same lace, and it really does make a difference!
The downside is that now I will have to remove the front of the wig and replace it with new lace, but it will definitely be worth the effort and expense to prevent the front of the wig from falling apart.
You can check out Sam's excellent work on his website: http://www.samcoxwigdesign.com
So, my sincere thanks to everyone who has shared a tip or helped me out along the way. I hope that some of my posts will be useful to other would-be wiggies along the way too. :P
EDIT: here are a couple of diagrams to illustrate what I mean. If you look at the photo above you will see that the holes in the lace are currently running like this when you look at the cap from the front:
I will remove the old lace and attach a new piece with the lace oriented so that the holes are running like this instead:
You will notice with the new orientation, it will be impossible to knot the hairs so that they are directed straight back (or straight forward if you are ventilating forward from the crown.) The knots will now have to be on a slight angle to the hairline. However, I find this makes a more natural hairline anyway.
Wednesday, 11 June 2014
Synthetic colour experiments
I have been fooling around with some of the heat resistant hair in different colours just to see how realistic I can get them to look. I have to say that I'm really amazed!
The hair I used here isn't the best quality I have seen, just standard heat resistant hair extensions from eBay, but even so I think the look is amazing!
In these samples I used a mix of three colours - #18, #10, and white - to try to emulate my own hair colour, a light ashy brown/dark ashy blonde with about 20% grey. I think I nailed it! I love the way it catches the light in the second shot.
Thursday, 29 May 2014
So many projects, so little time...
I just wanted to share this image of the coffee table in my living room as it currently stands. It seems that this little hobby of mine is starting to take over my life! I wonder if I will ever actually see a project through to completion? :P
I think my problem is that I am learning so much that, as I'm working on a project, I realize that I could be doing something differently or better so I move on to something else to test out my new theory!
I have been dying to try making a silk top, but am determined to finish at least a couple of these projects first, before moving on to something else! I still also have the Marilyn wig that is finished, but as yet uncut and unstyled...
I need a couple more hands, and at least double the number of hours in the day!
Sunday, 4 May 2014
Video update - synthetic blonde full lace wig.

Just a quick iPhone video to show my (very slow) progress on the synthetic full cap wig.
The great quality synthetic hair, along with light (80%) density and the single strand ventilation are all working together to give an incredibly natural result!
Click on the link below to view the video:
You Tube video
Wednesday, 23 April 2014
Frustrations with hair colour
I'm feeling very frustrated at the moment. I recently received some really good quality Brazilian remy hair that I buy in colour #16, a golden blonde, then dye down to a dark ash blonde/light ash brown.
My reason for doing this is twofold. First, the stock colours that the hair comes in tend to have a lot of red in them. Generally, I get better ash tones if I dye the hair myself. Second, the factories use fabric dye to colour the hair, which is almost impossible to lighten. When it comes time to bleach my knots, the colour lifts much more easily from hair that I have dyed with proper hair dye.
In a perfect world, I would be able to choose the dye for the colour that I'm after, and use it on any hair to achieve a perfect result. However, life is never that simple.
Here are a couple of tests I made using the same hair colour on two different kinds of hair. The sample on the left is average quality wefted Brazilian hair I already had. It took the colour exactly as I was hoping it would, giving a nice natural ash brown/blonde. The sample on the right is the new hair. It is much softer and finer, and will be beautiful to work with. However, the colour reacts very differently to this hair, and I end up with an ugly purple-grey.
If I knew more about colouring I could work with toners to get rid of the purple, but I just want a simple one-step process that will give me the results I'm looking for. I'm going to have to try another brand of dye and hope for the best.
If anyone reading this has any suggestions about what I might be doing wrong, please don't hesitate to comment. Advice is always appreciated! :)
Saturday, 19 April 2014
New ash blonde synthetic wig
I recently ordered some synthetic hair extensions on eBay, and was amazed at the quality of the hair. It looks and feels just like real hair to me!
I was not overly happy with the blonde 'quick front' wig that I made because the transition between the factory wig and the ventilated lace front was too obvious. So I wanted to make a full lace wig, and ventilate the whole thing using single strands/single knots. It is taking a while, but I think it will be a nice piece when it's finished.
Here are a few pics. The first one shows a small test piece I made, and the others show the wig in progress:


I am hesitant to cut away all that great looking hair. I also think I should have ventilated the hair more carefully at the back for a short style. It seems to me the hair direction at the nape would be quite important for a style this short.
I was not overly happy with the blonde 'quick front' wig that I made because the transition between the factory wig and the ventilated lace front was too obvious. So I wanted to make a full lace wig, and ventilate the whole thing using single strands/single knots. It is taking a while, but I think it will be a nice piece when it's finished.
Here are a few pics. The first one shows a small test piece I made, and the others show the wig in progress:
My original idea was to make a short men's style similar to this one by the John Blake company (http://wigsandfacialhair.com) which I love, but I will see how I feel when it's finished.
 |
| The piece by John Blake that inspired my project. |
I am hesitant to cut away all that great looking hair. I also think I should have ventilated the hair more carefully at the back for a short style. It seems to me the hair direction at the nape would be quite important for a style this short.
Friday, 7 February 2014
Small lace frontal
Here's another quick update. Not sure why I didn't post this at the time, but here's a small lace frontal piece I made using the Hugo Royer 40 denier Standard Stage Lace. Although this is the least delicate lace they offer, it still disappears amazingly well on the skin. I can't remember how this is attached, but I would either have used Ghost Bond XL or got2b glued Spiking Gel.
It is ventilated using custom-dyed Brazilian remy hair that I bought on eBay, and heat resistant synthetic hair for the grey.
The advantage of using synthetic hair for the grey is that you can dye the piece if necessary, and because synthetic hair doesn't accept any colour, the white hair stays white.
Tuesday, 4 February 2014
Crown swirl
Once again, apologies for not having posted anything for so long!
Just a quick one today. Here are a couple of photos of the crown area of a light density piece I have been working on. I have paid particular attention to the direction of the hair, and have tried to emulate the natural swirl that appears at the crown area. I'm quite happy with it. I think it's about as good as it's possible to be within the limitations of knotting hair onto lace.
This type of attention to detail wouldn't be necessary if the wig was longer, or if it was going to be brushed back over the crown. But for high definition movie wigs, or even hairpieces for men, which usually are cut shorter and have the crown exposed, this type of detail will be the difference between a natural looking head of hair and something that screams WIG!!!
 |
| The crown nearing completion |
 |
| The finished crown |
Subscribe to:
Posts (Atom)