Friday, 15 March 2013

New SFS lace test patch

I just received a piece of SFS (Superfine Swiss) lace that I ordered through Northwest Lace in the US.  They are actually a hairpiece company, not a wig materials supplier, but I had heard that their SFS was very good quality, so I contacted the owner, Eric, to see if it would be possible to buy a piece.  He very kindly agreed, and arranged with his factory to have a yard of SFS shipped out to me.

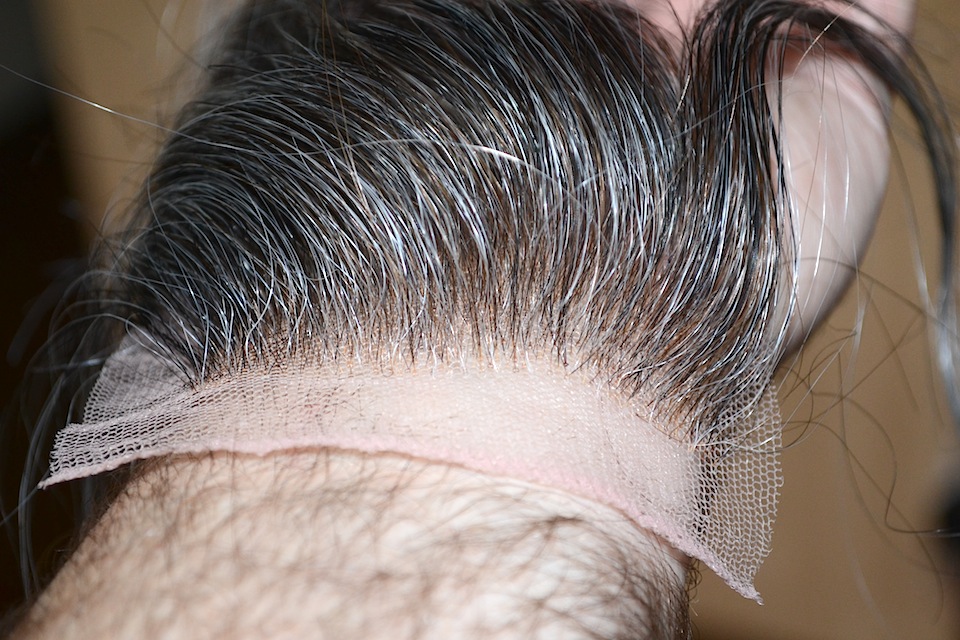
The SFS is much finer than the lace I have been using previously, and has definitely taken some getting used to.  Although it is quite delicate and more fragile than my other lace, the main problem I am having is just being able to see which hole to knot into.  Not only is it finer, so more difficult to see, but also the lace has a bit more more stretch, so the holes actually move around slightly while you're ventilating, making it more difficult to maintain any kind of pattern.

However, the end result is fantastic, and I will definitely be using the SFS at least for the front of my next piece.  Below are a few shots of just a small test piece I completed just to see how well the SFS worked for me.  The small (1 by 2 inch) patch is attached low on my forehead to avoid my own natural hair.  This time I have just attached with got2b glued hair gel.  Even with the got2b, the attachment is fantastic, but I would imagine with a proper adhesive, the lace will disappear completely.

One thing I'm not happy with this time is the knot-bleaching.  I decided to use all double knots in this test, to see if they would be feasible in the front hairline for the sake of durability.  I used a 40vol. developer to bleach them, which I would normally leave on for 30 minutes max.  However, I ended up bleaching this piece twice, a total of 60 minutes, and the knots are still too visible for my liking.

So, I will be back to using single knots when I start the next full piece, at least for the hairline area.  For me, it's definitely worth sacrificing a bit of durability for the most undetectable hairline possible.  I'm glad I discovered this on a small test patch rather than after I had ventilated an entire hairpiece with double knots!

One other thing regarding bleaching: recently I have been adding a few drops of Ardell Red Gold Corrector Plus to the bleach mix, and it really does a great job of neutralizing those nasty yellow tones that you often get.


This shows the test patch pinned to a styro head during the bleaching process.

Thursday, 7 March 2013

Full cap continues

I have been moving ahead quite well with the full cap ventilation.  I'm trying to pay particular attention to the direction of the hair growth, as well as keeping the density in the 65% zone.  Most wigs I see seem much too dense and 'wiggy'.  I mentioned in the previous post the the hair I am using is being cut off an old lace front (human hair) wig.  Even with all this hair removed, it's hard to tell there's any missing!  I'm sure there will be enough hair for two or even three wigs from that one store-bought wig!

Speaking of the hair, I'm happy to report that boiling the wig only temporarily frizzed the hair.  After wetting it and allowing it to dry naturally, the hair has returned to its previous (albeit wavy) condition.

Incidentally, at this stage, I'm not too concerned about making the knots small and invisible.  As this is just an experimental piece, I plan on leaving the hair quite long so the knots in the back will never be seen.  Once I get to the crown and front, I will begin ventilating with single hairs for a more natural look.


Sunday, 3 March 2013

Full cap progress

I have been stuck at home with the flu for a few days, with nothing to do but watch Netflix and ventilate.  I have made a bit of progress, probably about an inch up the nape.  My largest needle is a #2, so ventilation is slow-going.  But with the pattern I'm using, the density should be about right - somewhere in the neighbourhood of 65%.

The hair is looking a little frizzy.  It is indian remy hair that I'm cutting off an old lace wig.  It was originally quite wavy, but I read somewhere that if you boil the hair the wave will relax.  Well, it did, but the hair has frizzed instead.  I'm hoping I'll be able to smooth it out once it's finished, but this might be as good as it gets.  I don't think I'll be boiling any more wigs...


Friday, 1 March 2013

Full cap lace base

In preparation for the next project (or at least one of the next projects) I set out to make an all-lace full cap base.  Not being particularly skilled in the sewing department, it wasn't an easy task to figure out how to make the lace conform to the shape of the head block.  After much trial and error, however, and a good deal of internet plagiarism, I ended up with what you see in the pictures.  I did it in three sections, starting with the front.  I pinned the lace into place, then stitched the darts by hand with invisible thread.  Once I was satisfied that the front was holding its shape, I attached the lace to cover the crown area.  After stitching the darts, then joining the two pieces, I moved on to the nape area.  Once everything was joined and shaped to my satisfaction, I trimmed off the excess lace around the seams.  I'm pretty happy with the result.

Now, let the ventilation begin!


The lace cap pinned to the head block.

From the back, showing the darts in the crown and nape areas.
Shown here with the template used to transfer the shape to the head block.

Saturday, 9 February 2013

New Hairline

I still haven't started the new hairpiece, but I have been continuing my experiments using small test patches.  I think I have settled on a good density for me, and I have finally got the colour pretty close to my real hair colour.

The most recent test (below) was to create a more natural, graduated hairline.  I'm really happy with the result!  The pics show a patch about 1 x 2 inches, attached low on my forehead, below my natural hairline (so that I had clear skin to bond to.)

I have attached here with Walker Safe Grip.  My attachment skills aren't great yet – you can still see a few areas of lace that haven't disappeared too well – but overall it's not too bad.  I am still having issues with shine from the glue.  It's not too noticeable here, but under strong lights it's very obvious.  The experiments continue...


Saturday, 24 November 2012

Density and Grey Percentage Tests

I have begun thinking about my next hairpiece.  I still haven't finished cutting in the first one, but due to the problems with density and colour, I am eager to move on to the next one.  I have been experimenting with different densities and colour/grey combinations, and I think I'm getting closer to what I'm shooting for.  The first step was to dye the hair.  My hair naturally is a dark ash blonde, which is what I was trying for in the first piece.  However, it seems to be getting darker as I get older, so I have progressed to a very dark brown-black (which I think would be a 1B in the standard colour system) and it seems to be working, at least at the back and sides.  The hair on top of my head is still more ashy brown, so I might try to vary the colour throughout the piece to more closely approximate what's left of my real hair.  We will see how things go... :)

Anyway, here is what I have been working on.  I have ventilated a couple of small patches, both with different densities and grey percentages.  The first is 66% density with 50% grey:
The test patch sitting on my arm.


The second is 63% density with 21% grey.  If I decide not to vary the colour throughout the piece, then this is the one I think I will use:


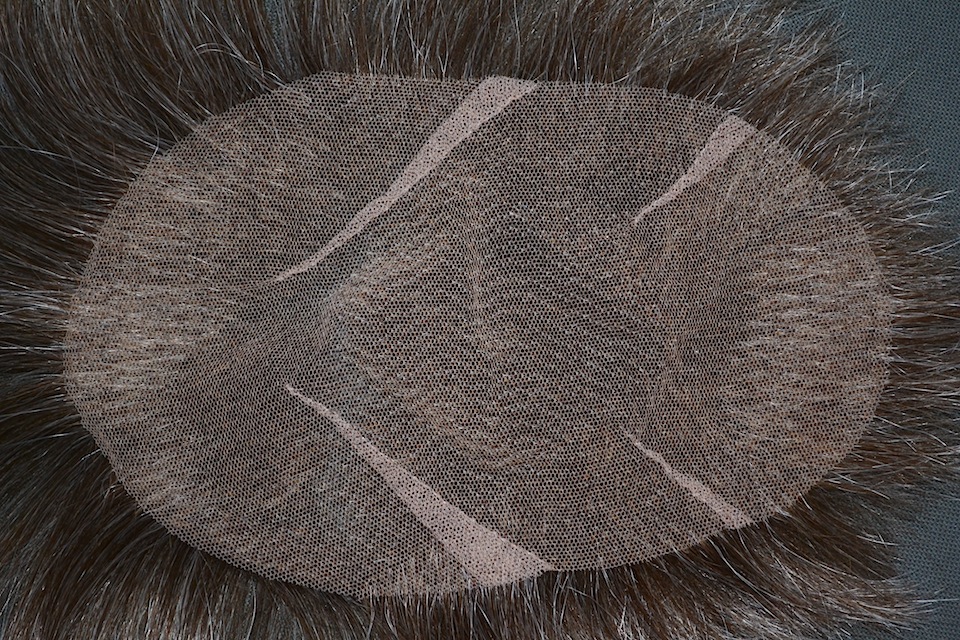
An interesting accidental discovery:  The grey synthetic hair I'm using is longer than the dark human hair, so when I ventilate them together I get a beautiful fade from dark to light grey.  Unfortunately all the light grey will be cut out in the final piece, but it's something I might try to incorporate in a future project.  The one thing I really don't like about the synthetic hair is that the pressure of knotting in onto the lace causes it to develop a kink near the base of each hair.  Although this does straighten out a bit with time, it never really disappears completely.  I made the mistake of trying to wash the first patch with hot water to see if it would relax the kink.  Unfortunately it only loosened my knots!  If you look closely at the first pic you will see some large loops in the hairline.  I definitely won't use hot water again!

This last pic show my process of bleaching the knots.  Rather than spread the bleach on the back of the lace as I have seen many people do, I prefer to cover a styro head with plastic wrap and spread a thin layer of bleach solution onto the plastic.  I tie up the hair of the piece to keep it out of the way, and lower the lace into the bleach, pulling it tight and pinning it down so that the bleach oozes through the holes a bit.  I find it easier to control this way:


Wednesday, 14 November 2012

Ventilation Pattern & Inside View of Hairpiece

This is the vent pattern I used for the hairpiece.  Here the solid dots represent the ash brown hair, and the open dots represent grey.  I found this to be too dense, so next time I will stick to just the open hexagon pattern, essentially eliminating the positions where the grey hairs are tied.


Here is a shot of the inside of the piece.  It took me a while to figure out where to put the pleats.  I'm still not sure these are in the best place, but I think the most important thing is to keep them away from the front hairline.  I was worried that they would be really visible once the piece was attached, but the actually disappeared quite nicely (even though I only attached the piece over my own hair.  I'm sure they would be completely unnoticeable if attached over bare skin.)